uVersion
English
Download →

Wiki

Groups

Group users together to grant permissions in one step. Groups are global, and the Groups tab is reserved for the super admin.

Introduction

A group is a named set of users. Its purpose : grant a permission to a whole group at once, rather than to each person. When the team changes, you simply add or remove a group member and their access follows.

A typical example : an Artistes group with write permission on Content/, a Programmeurs group on Source/.

Groups are global A group belongs to no repository (a repository being a project versioned on the server) : it exists at the server level and can receive a permission on any repository. That is what makes editing them sensitive (see below).

Access and roles

  • Super admin : the Groups tab is reserved for them, and there they do everything (create, rename, delete, add and remove members).
  • project_admin : they do not see the Groups tab and therefore have access neither to the list of groups nor to their members. They do, however, find the existing groups in the subject selector of the Permissions tab, which is enough for them to grant access to a whole group on their own repositories.

Why this restriction : because a group is global, modifying it would silently move access across all the projects that use it, including those a project_admin does not administer. Group management therefore stays with the super admin. A project_admin who needs a new group must request it.

Create a group

Reserved for the super admin.

1. Open the Groups tab

In the sidebar, open Admin, then the Groups tab. Mind the right row : the panel has two, SERVER for what concerns the whole server, and PROJECT for what concerns only the repository selected right next to it. Since groups are global, they live in the SERVER row, and the repository shown in the other row has no influence on what you do here.

The two rows of tabs of the administration panel : SERVER with Dashboard, Repositories, Users, Groups, Locks, Audit Log and Distribution, then PROJECT with the repository selector followed by Permissions, Rules, Webhooks and Files.

2. Open the creation window

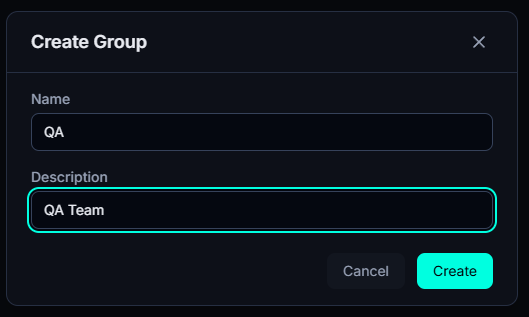
The tab has two panels : the list of groups on the left, the members of the selected group on the right. In the header of the left panel, click the + button, to the right of the refresh button. The Create Group window opens.

The Create Group window : the Name field, the Description field, and the Cancel and Create buttons.

3. Name the group and confirm

Name is required (1 to 100 characters) and the button stays inactive as long as it is empty. Description is optional. Confirm with Create : a name already taken is rejected, and otherwise the group appears in the left-hand list, empty.

Manage members

1. Select the group

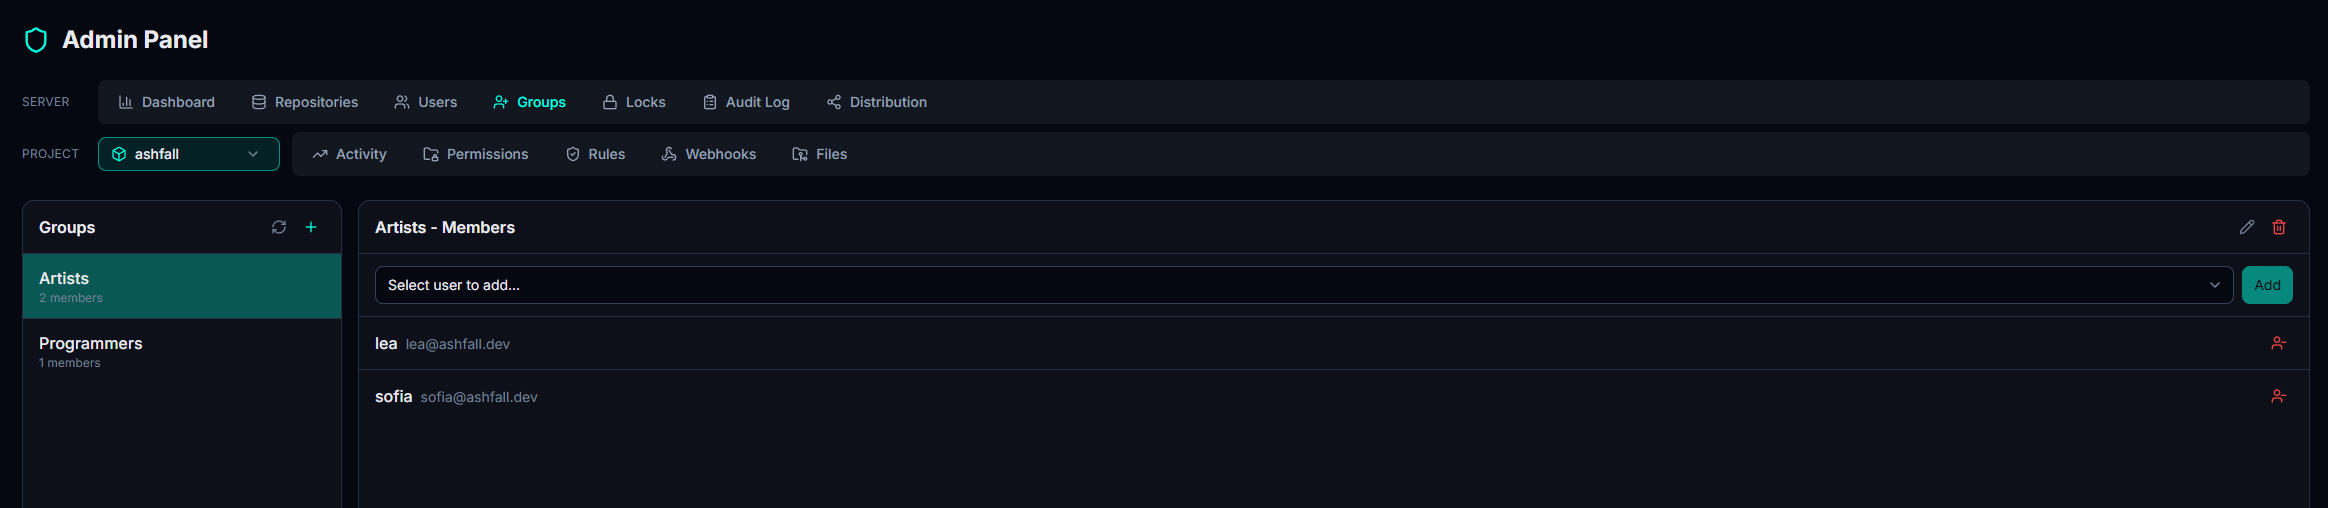
Click the group in the left-hand list : its row shows its member count, and the right panel takes as its title the group name followed by Members.

The two-panel view of the Groups tab : on the left the list of groups with their member count and the selected group highlighted, on the right the Members panel with the Select user to add menu, the Add button and one row per member.

2. Add a member

Choose an account in the Select user to add... menu, then click Add. This menu only lists active accounts that are not already members : someone you cannot find is therefore either already in the group or deactivated. Adding a member who is already present does nothing.

3. Remove a member

The red button at the end of the row removes them from the group. They immediately lose the permissions the group carried, on all repositories.

Grant a permission to the group

A group gives no access as long as no permission is granted to it. This is not done here but in the Permissions tab, repository by repository. It is also the only place where a project_admin comes across groups, since they do not see the Groups tab.

1. Open the Permissions tab of the right project

The PROJECT row this time, and the repository selector is at the head of the row : the permission will only apply to the project shown there. A group is global, a permission never is.

2. Choose the group as subject

The selector at the top of the folder tree contains two sub-lists, Groups and Users. Take the group in the first. A rule targets one or the other, never both at once.

The Permissions tab with a group chosen as subject in the selector, the folder tree checked, the bar announcing the number of selected folders with the write, read and none levels then the Apply button, and below it the group Active rules table.

3. Check the folders and apply

Check the folders concerned in the tree, choose the level (write, read or none) in the bar that appears, then click Apply. The group's rules then display in the Active rules table, where you can remove them one by one. The detail (patterns, priority, default access) is on the Permissions page.

Delete a group

Deletion cascades Deleting a group also removes all of its members and every permission granted to that group, on all repositories. Users immediately lose the access they held through this group. A confirmation reminds you of this before acting.

1. Select the group

In the left-hand list, click the group to delete : it is the one the buttons on the right will target.

2. Delete, then confirm

In the header of the members panel, the red trash can (to the right of the pencil, which renames the group) opens the Delete Group confirmation. It recalls the cascade but does not name the repositories concerned : check before confirming.

Common pitfalls

Editing a shared group changes access everywhere

Because a group is global, adding a folder to its permission in one project may look local but is still carried by the same group if it is reused elsewhere. For genuinely different needs between two projects, prefer two separate groups.

Does a removed member keep access ?

No : as soon as they leave the group, they lose the permissions the group carried. If they still have access, it means they hold a direct permission (granted to their account, not to the group) : check the Permissions tab and its test result.