
Wiki
Permissions
Grant a group or a user read / write / none access on folders of a repository. Patterns, priority, default resolution, permission testing.
Introduction
The Permissions tab defines, for a given repository, who can read or write in which folders. A permission targets a group or a user, applies to a path pattern, and carries a level (write / read / none). The role says what an account can do; the permission says on which files.
Access and roles
The tab is available to the super admin (all repositories) and to the project_admin (the repositories they administer). Rules are always attached to the selected repository.
The three levels
| Level | Effect |
|---|---|
write | Read and write (check-out, check-in) on the covered paths. |
read | Read only: can synchronize, cannot modify. |
none | No access: explicitly hides a folder, even if a broader rule would allow it. |
Granting access
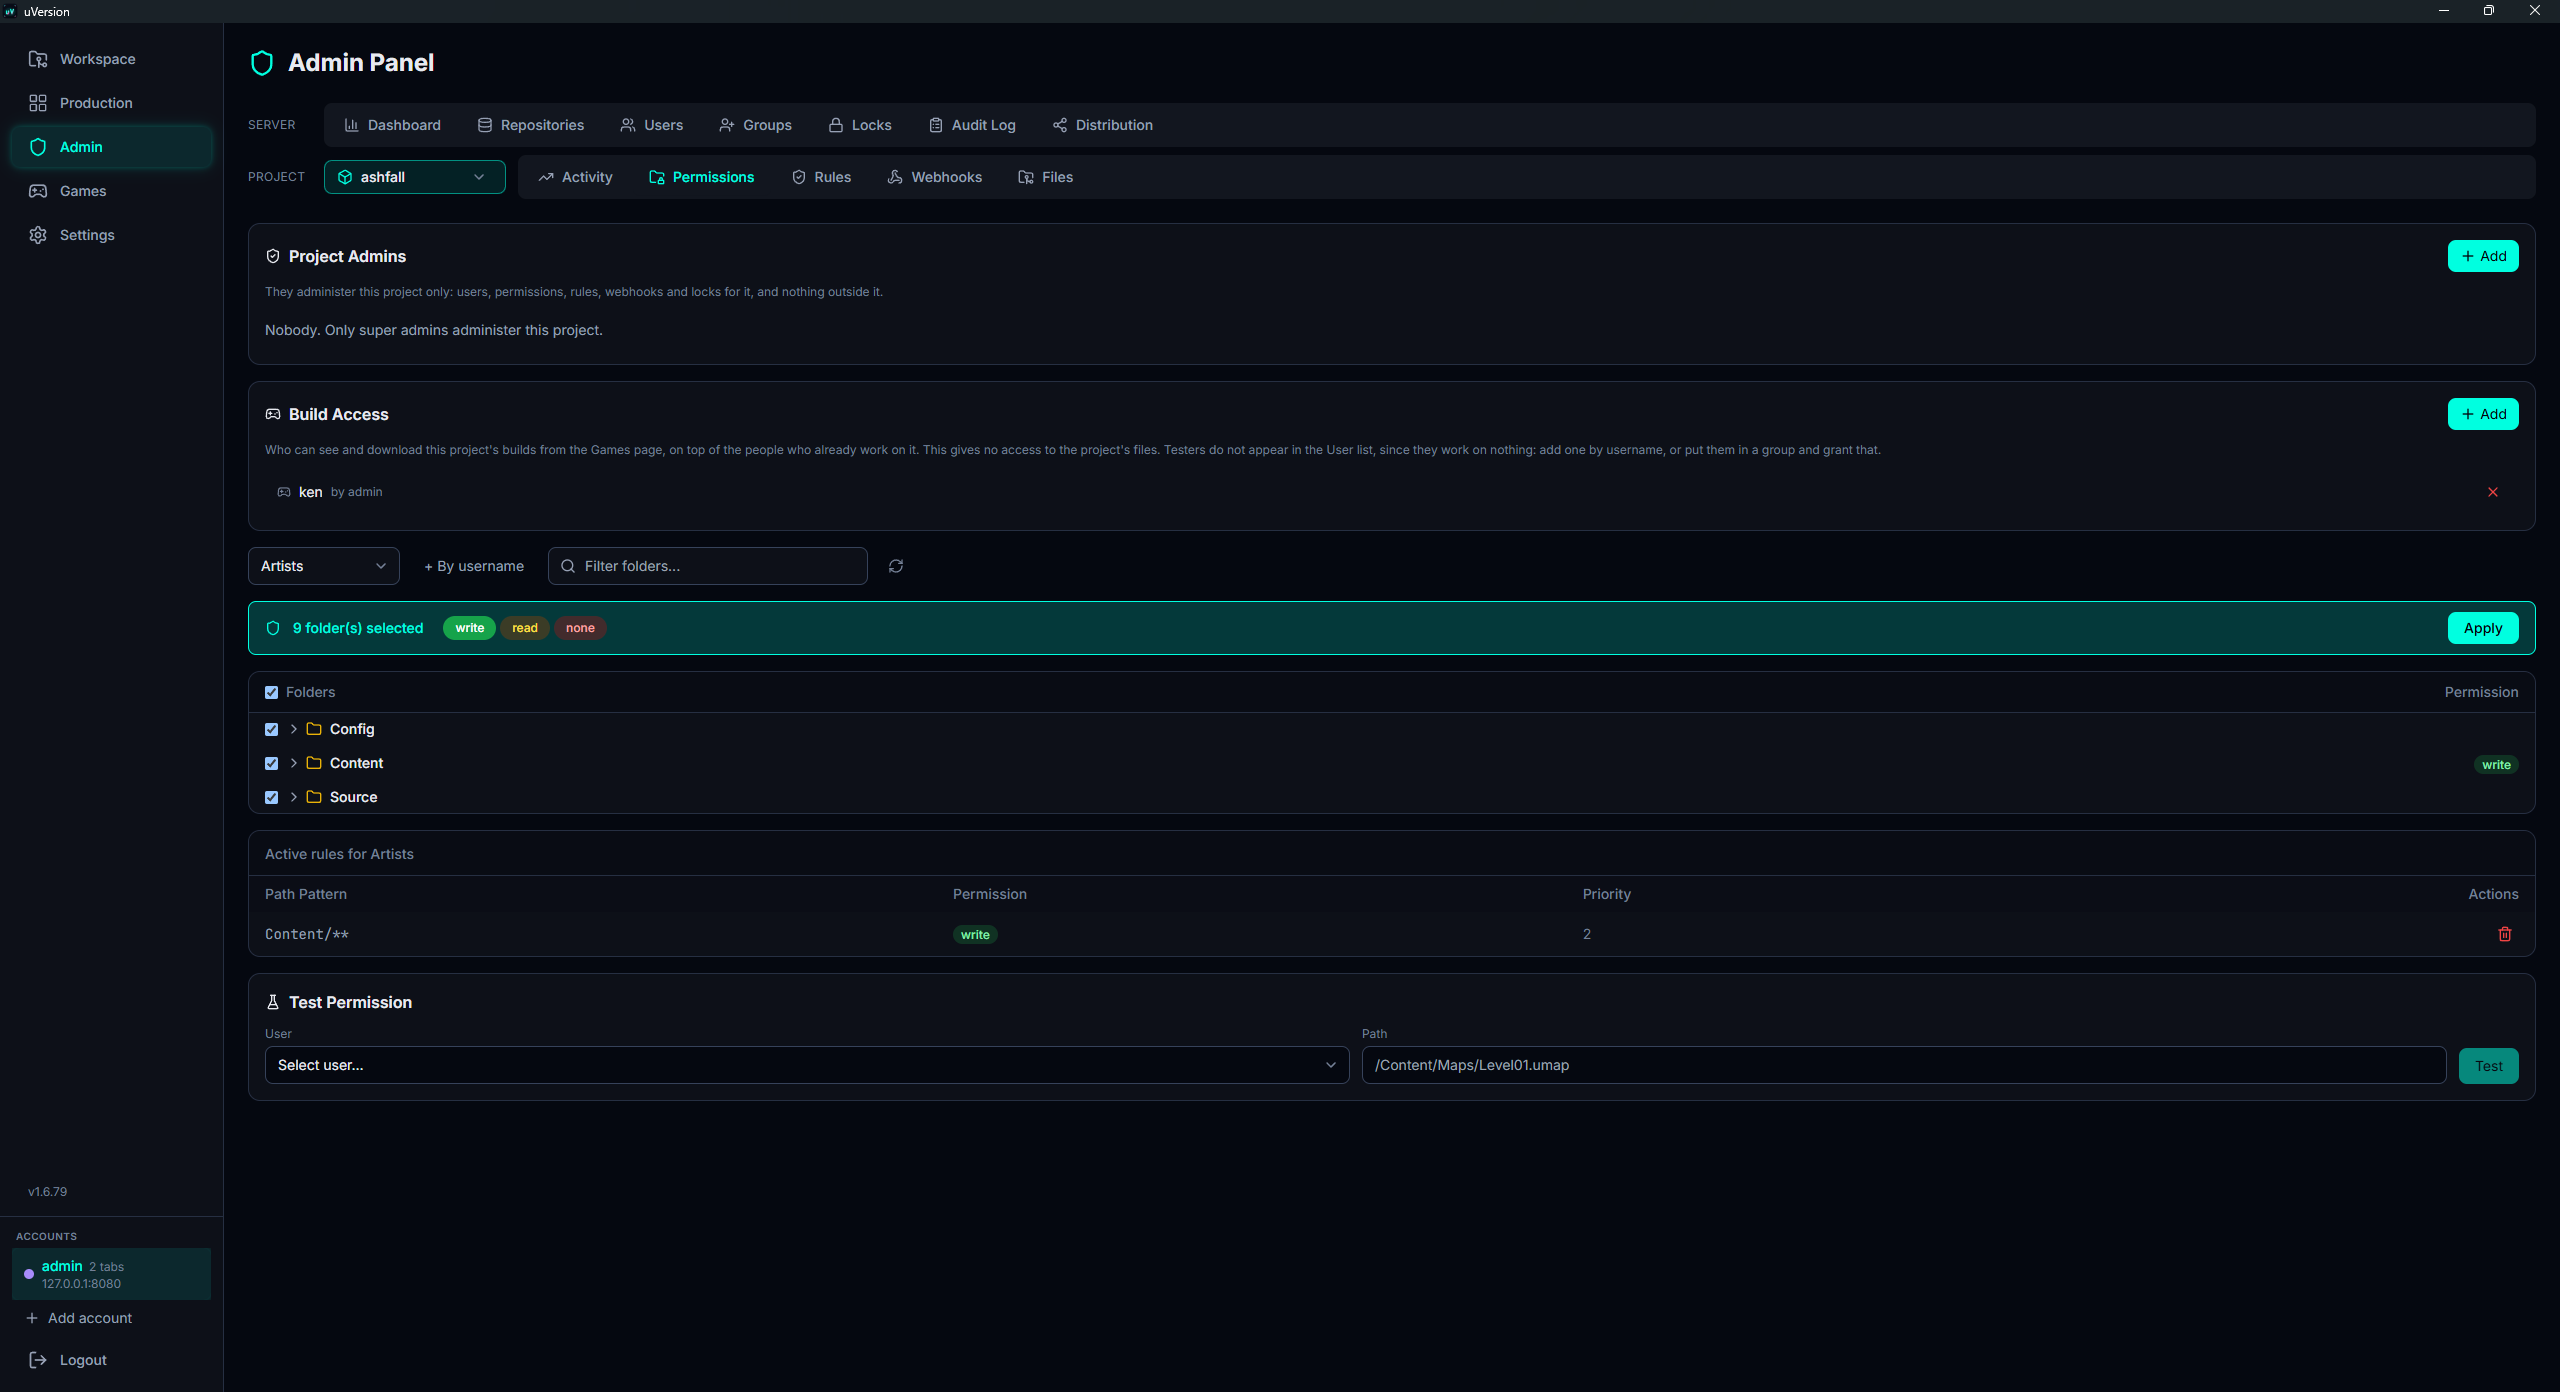
- Select the repository, then the Permissions tab.
- Choose the subject in the picker: a group or a user (two sub-lists "Groups" and "Users"). A rule targets one or the other, never both.
- In the folder tree, check the folders concerned (the boxes have three states: all / partial / none). A search field filters the tree.
- In the bar that appears, choose the level (
write/read/none) and click Apply.
The subject's active rules are shown in a table (pattern, level, priority) where you can delete them one by one.
Grant by username
The "+ By username" button lets you grant access to someone who does not appear
in the visible list, by typing their exact name. This is the way to grant access to an account
outside your usual scope, for example a playtester who does not yet hold any permission.
The name must match exactly (no prefix). The field returns only the identifier and the name, never the role, so it cannot be used to probe existing accounts.
Patterns and priority
A checked folder Foo/Bar becomes the pattern Foo/Bar/** (the folder and everything it
contains, at any depth). The repository root becomes /**.
Each rule receives an automatic priority equal to the depth of the folder (number of segments,
root = 0). A more specific rule (deeper) therefore wins over a more general one.
Example: write on Content/** and none on Content/Secret/**
gives write access everywhere in Content/ except in Secret/.
Parent/**
(which also covers future sub-folders) and removes the child rules that have become redundant.
Default resolution
When no explicit rule covers a path, the effective access follows this model:
- By default, access is read when no rule matches.
adminandleadhave write everywhere (role bypass).- A
project_adminhas write on the repositories they administer, and nothing special elsewhere. - Otherwise, the most specific rule applies; failing that, the default read.
In other words: to deny read on a folder to someone, granting nothing is not enough
(the default is read), you need an explicit none rule.
Testing a permission
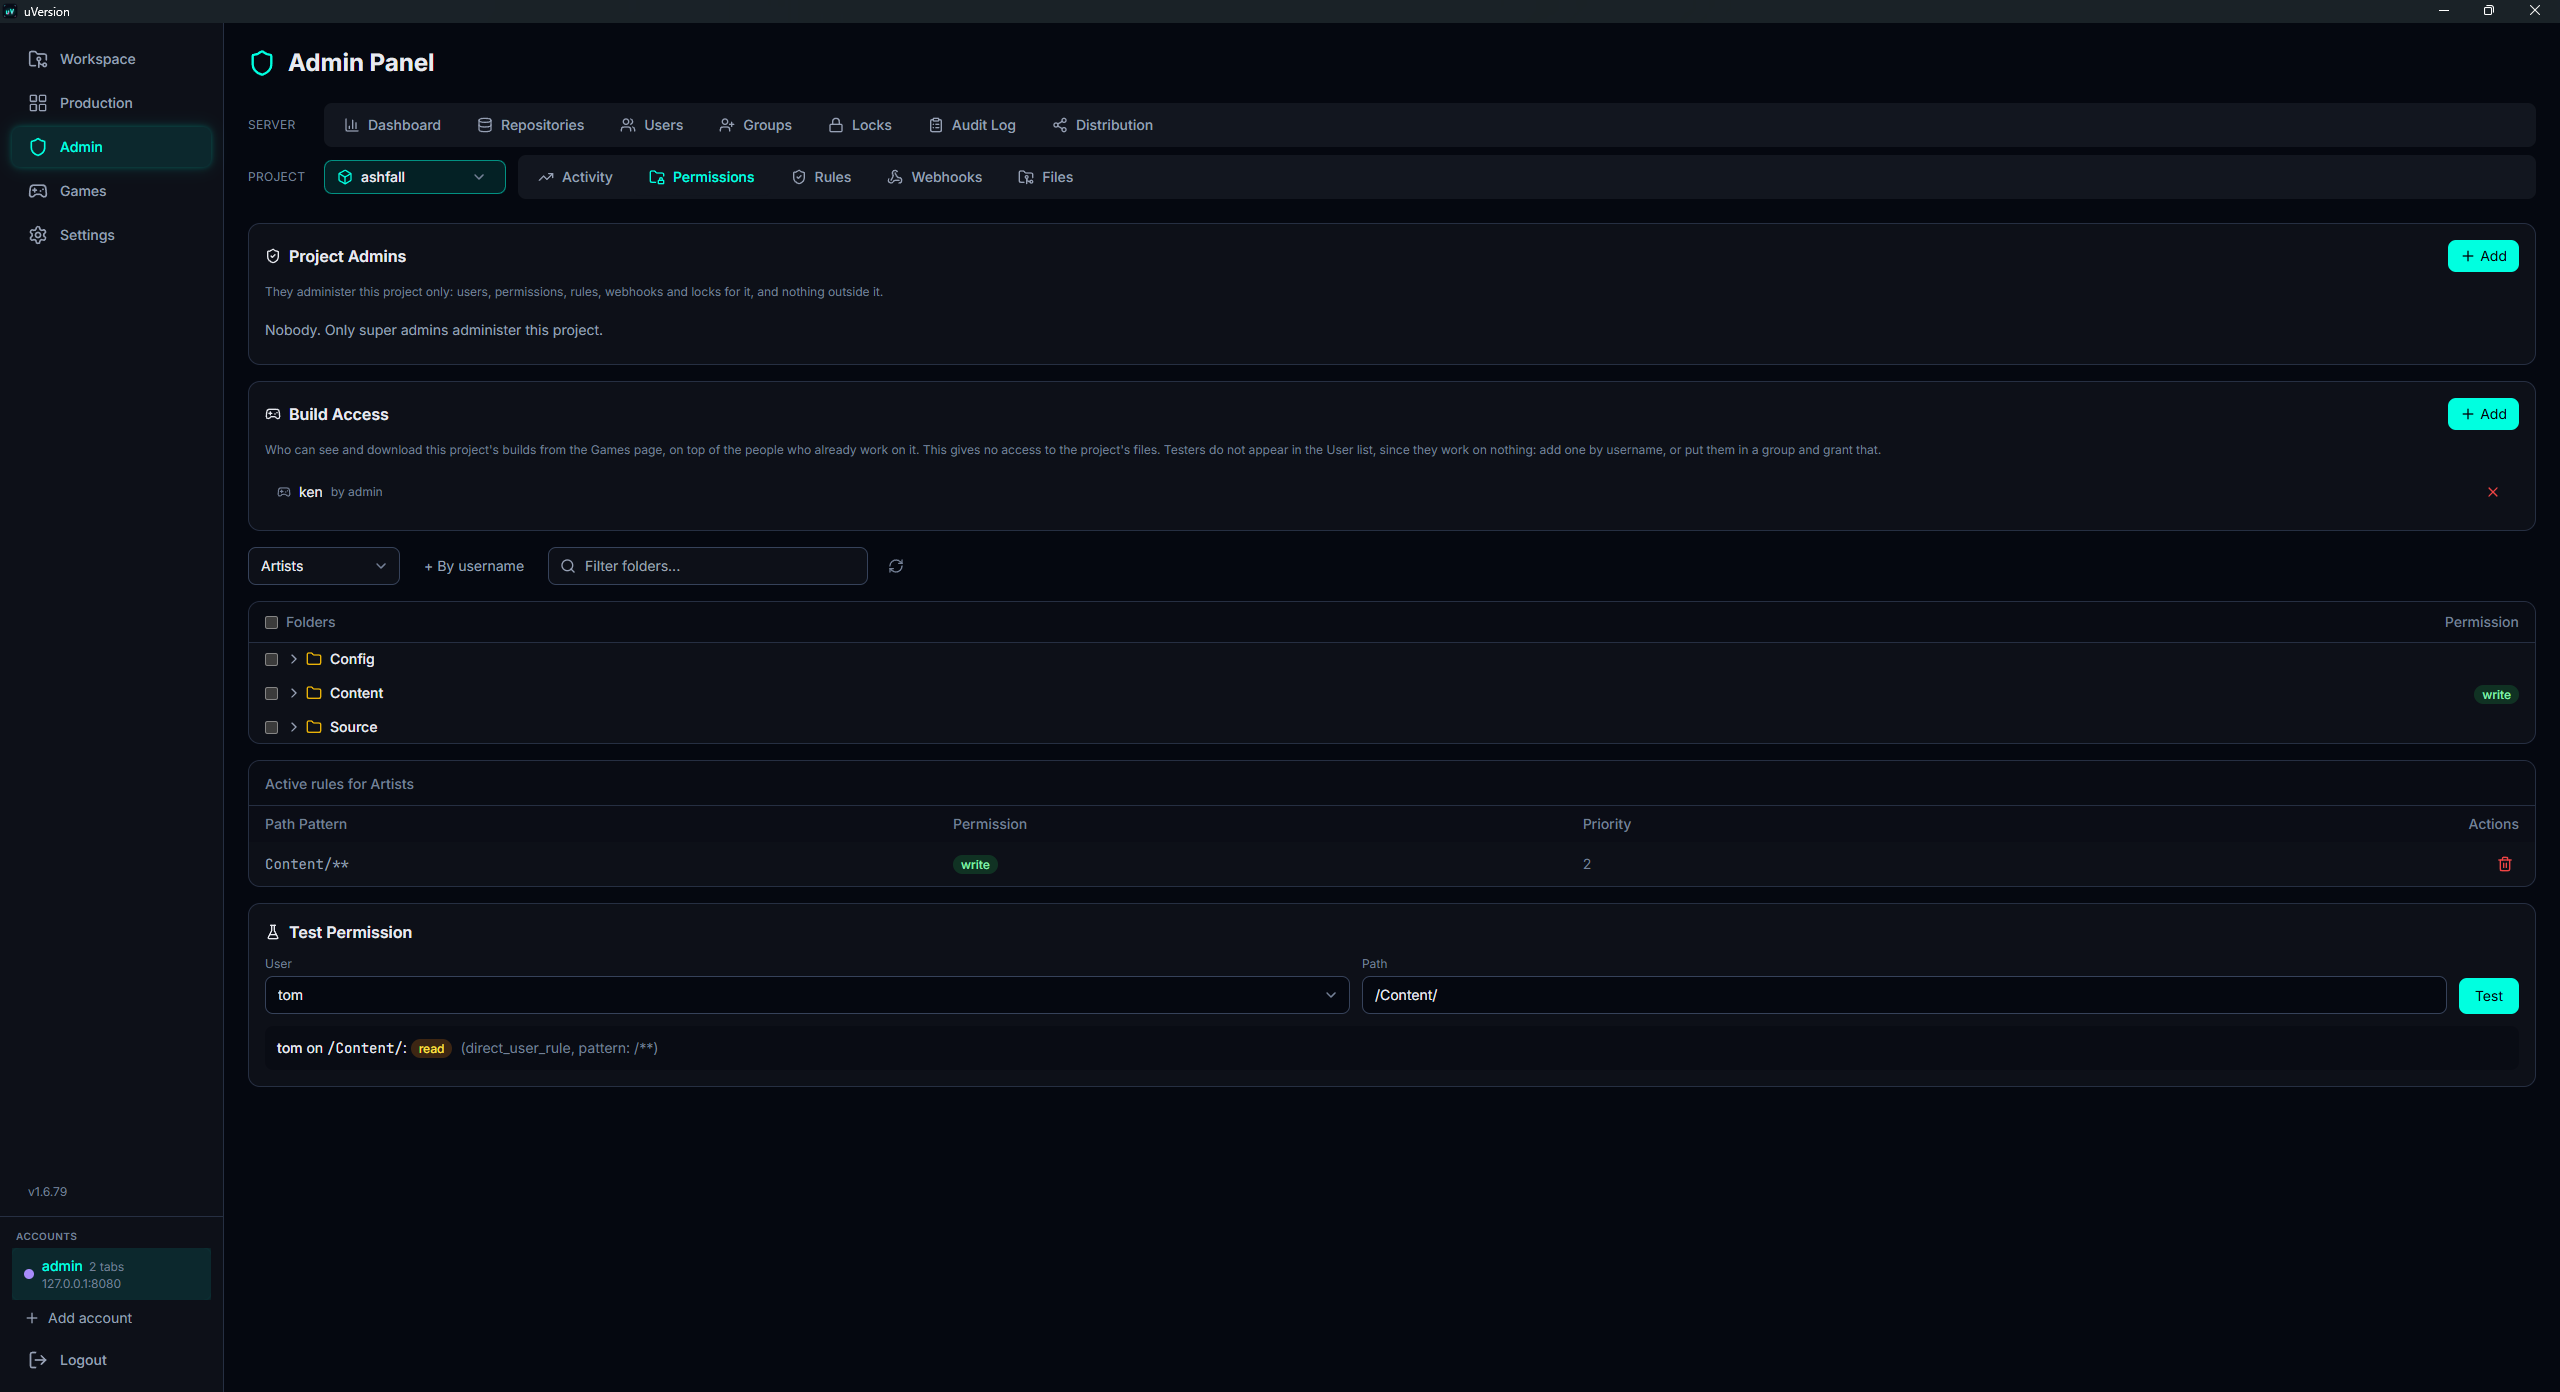
The Test Permission panel answers "what effective access does this user have on this path?".
Choose a user, enter a path (e.g. /Content/Maps/Level01.umap) and run the test.
The result shows the effective level, along with the source and the pattern that
decided, which lets you understand why access is granted or denied.
For a user you are not allowed to see, the test returns the same "not found" as a nonexistent account, so as not to reveal the existence of accounts.
Common pitfalls
"I granted nothing, yet they can read"
That is the read default. To close a folder, place an explicit none rule on it.
Two rules contradict each other
The most specific one (greatest depth) wins. Use the test to see which one decides.
A lead stays in write despite a none rule
The admin and lead roles bypass path rules (write everywhere). A none
rule does not restrict them. Same for a project_admin on their own repositories.
Access via group vs direct access
Access can come from the account itself or from a group it belongs to. If removing a rule changes nothing, look for the other source (the test indicates which one applies).